How to Add a Student
By ReMo Team
Add a Student
Login to educators.remo.app
Go to the Main Menu
Go under Your classrooms and select the name of the class you want to add students to. This will take you to your class home screen. To add students to your class, select Student roster. Add the school email address for each of your students. Make sure each address is separated by a comma and a space. (For example, studenta@school.org, studentb@school.org). When you have entered all of your students’ emails, select the Add students button.
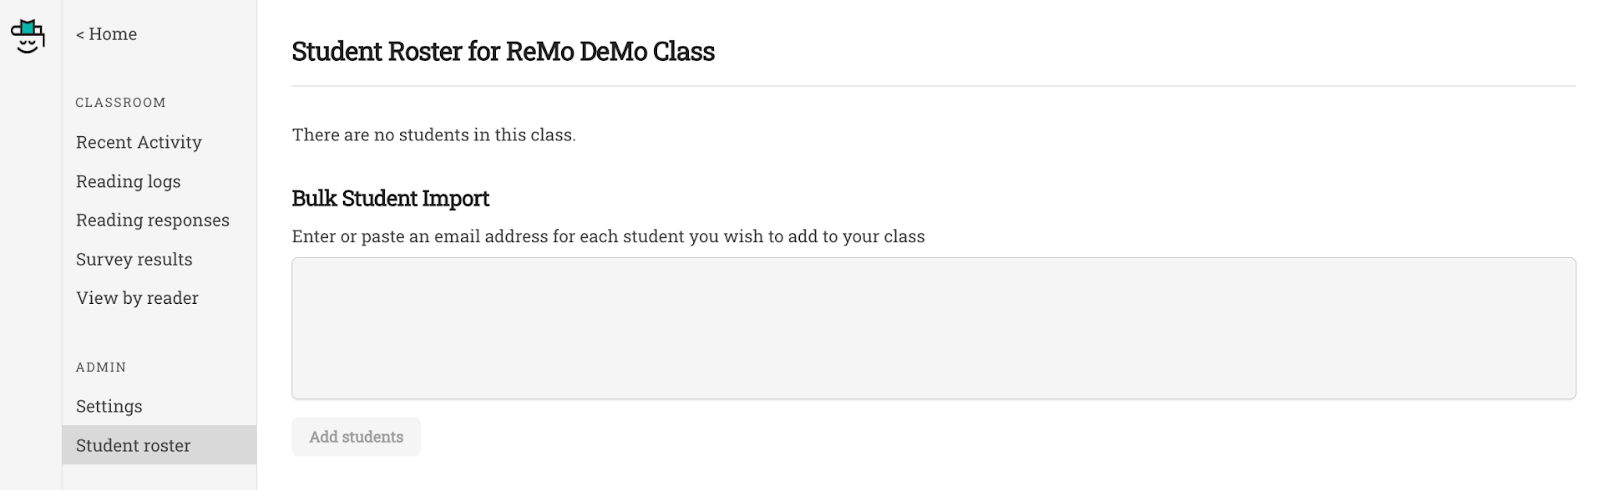
It will create a list of all of your students; however, only their email addresses will appear and their individual names will be missing until they sign in to go.ReMo.app.

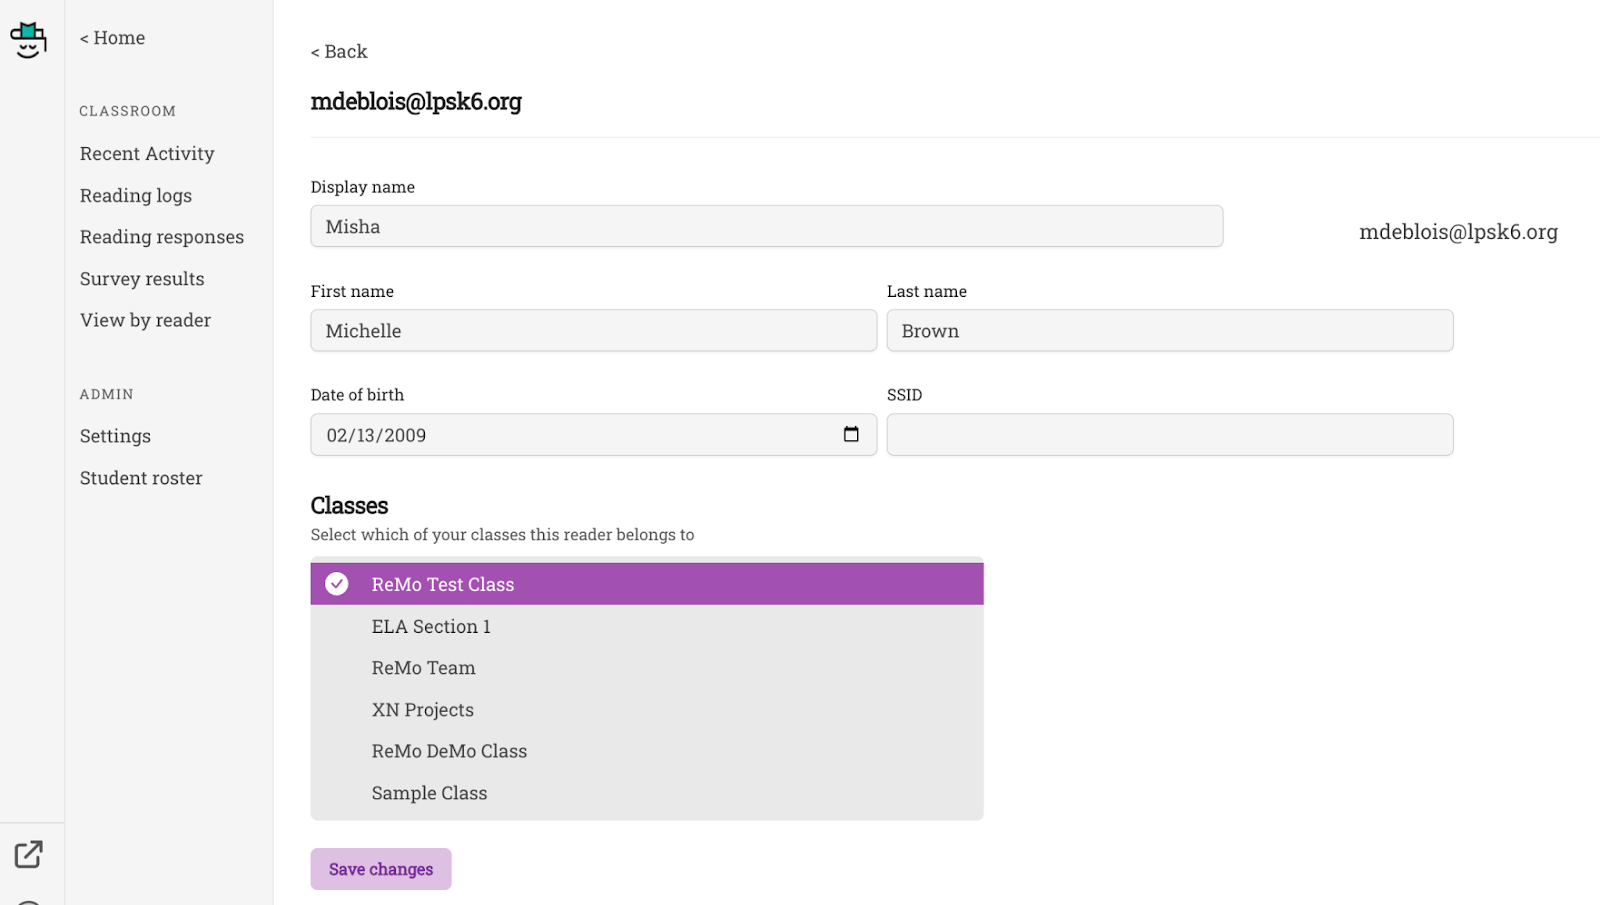
When you click on the “View” button for an individual student, you can see the student’s personal information. You can enter the DOB and MEDMS number (SSID) for each student. You can also see (and select) which classes your student belongs to. Make sure you hit the “Save changes” button at the bottom of the screen.
Helpful Hints:
The Display name is the preferred name in the student’s profile. Student’s choose their own preferred name; however, you can change it here if there are any issues. The student can also edit it in their profile.
Do you need to move a student to a different one of your classes? Just click on the class roster of the class the student is currently in. Then, click on View for the student you want to move. Select the class you want the student to be put into, and then, deselect the class they are moving out from.
Video link: Need a little extra support? Check out our quick video tutorial here.
Next Steps:
Now, it is time to set up your own reading profile. Go to ReMo for Readers materials.
Got Questions? Or suggestions? Our ReMo Team cares what you and your students think, feel, and experience so please email us at support@remo.app.